How To Jam over wifi
Introduction
First that means that you need to have at least two device both connected to the same wifi network. (first step of troubleshooting, is always to check that wifi is enabled and that you are connected to the same router. Even if we have done that a billion times, it still happens …).
If you click the IO icon : ![]()
You should see this configuration dialog appear :
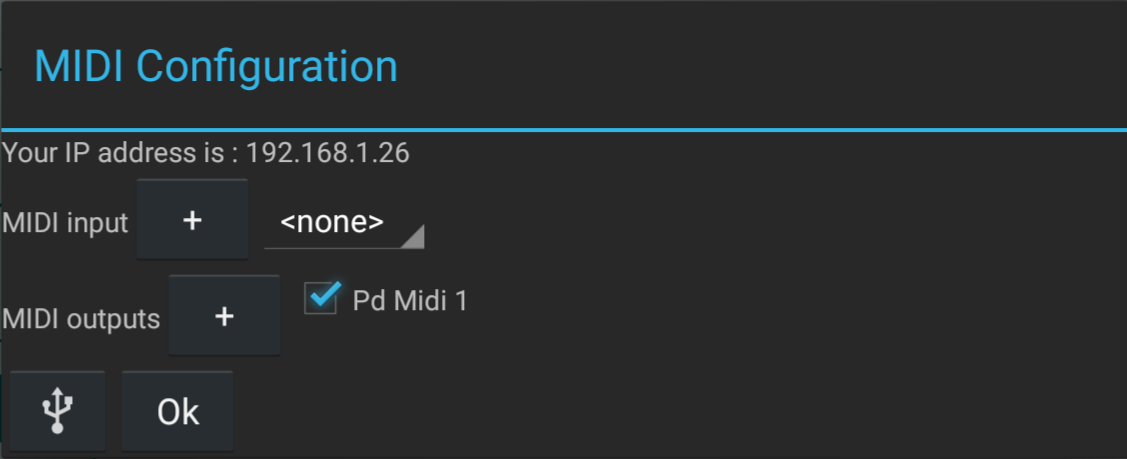
First information is your ip address you will need this information depending on the scenario you choose : you either will be a slave or be the master. That’s what happens in a midi environnement … A master can have more than one slave, but slaves can only have one master.
You want to be a slave
So you choose to be a slave, good for you ! all you need is to create an input configuration.
So you just have to tap the “+” icon next to the MIDI INPUT line: ![]()
When you do that another dialog appears :
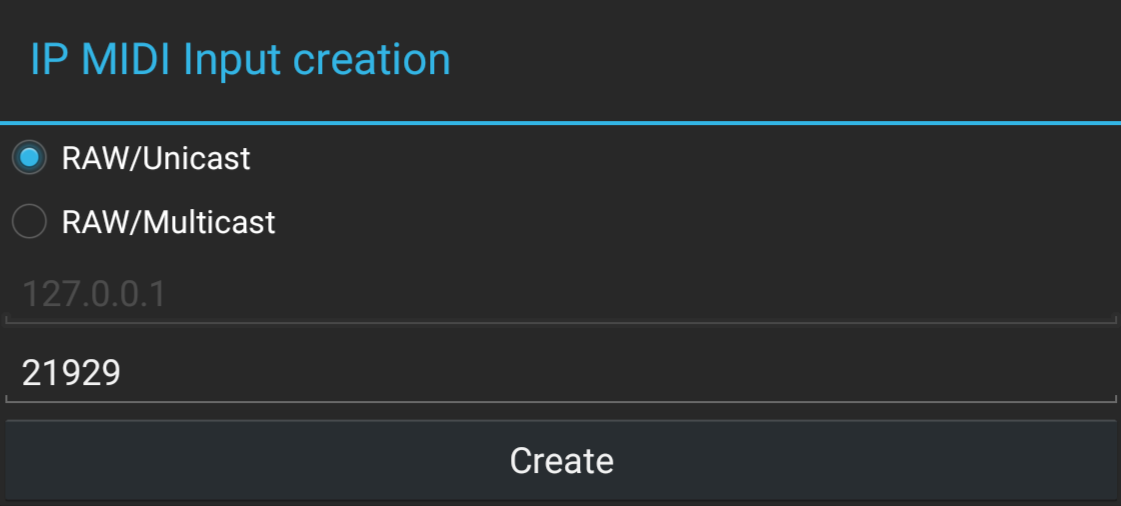
You won’t need to modify anything there and you just have to click “create”. FIY 21929 is the port you will receive information from, so be sure to tell your master if you change it.
If you want to run a second app on the same device, though it is officialy not supported and not tested, you can’t use a port twice so you’ll need to change this value to something else (again be sure to inform your master).
Congrats ! you are now a slave, if a master gives you orders you will now execute them ! In our context the master will just drive your clock, and you’ll be able to choose the subdivision of the main beat you are using to build your patterns.
You want to be a master
With great power comes great responsibilities … Not only you will have the hand on the clock, but you’ll have to manage the forwarding of the beats to all other devices you want to join.
This is because chose to use the unicast method because it worked better for us, for security and performance reasons hopefully it will work for you too.
For each of the devices you want to forward beats to, you need to create and activitate a new output by tapping the “+” icon next to the MIDI OUTPUT label : ![]()
This will open this dialog :
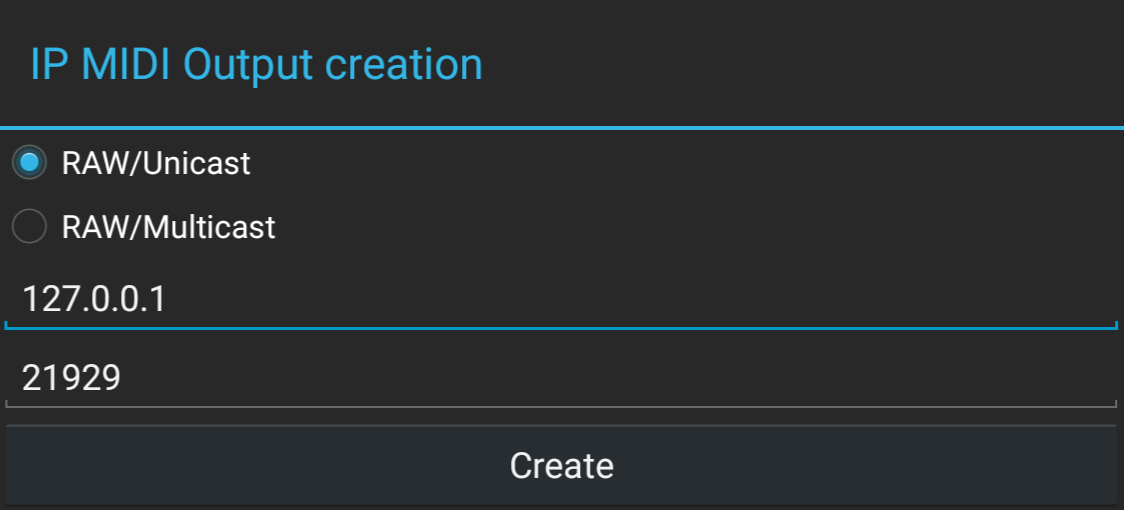
You have to reference each ip address and port of the slaves as they have configured it. Then click on Create.
A new entry will be created in the list of available outputs, you just to check it :
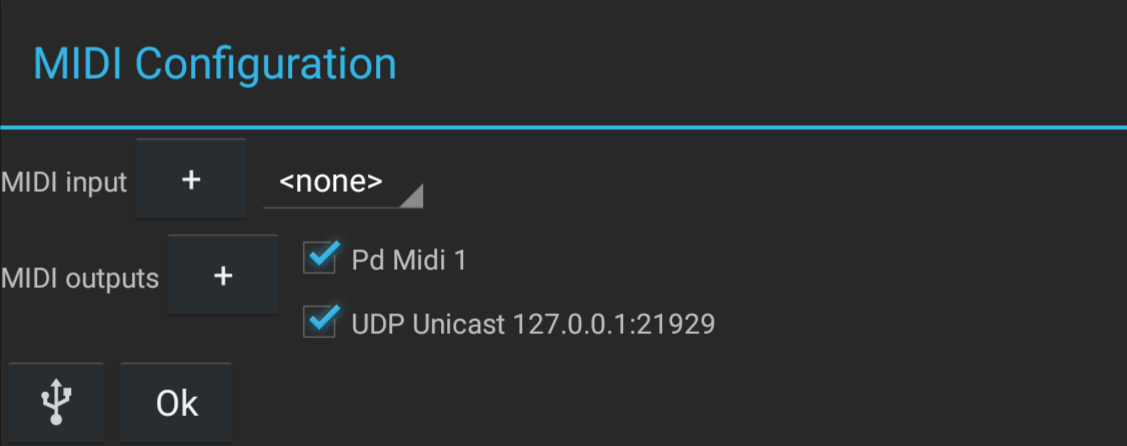
That’s it ! do it for every of you slaves/buddies. And you can now go on to the next step which is about dealing with latency.
How to deal with audio latency
A note on Android and audio latency
Android has a wide range of devices, with a wide range of prices, and consequently a very wide range of hardware configurations, some devices have better performances than others and it is of course applicable to network and audio performances.
According to wikipedia audio “latency refers to a short period of delay (usually measured in milliseconds) between when an audio signal enters and when it emerges from a system.” So this is quite a big issue for what we want to achieve, according to the hardware fragmentation of the potential devices we may encounter. The good news is that it seems to be a constant for a specific device.
How to proceed
It’s best to setup latency device by device. And from our experience you should probably choose as master the device with the bigger audio latency.
Once you have setup a master and slave :
1- the master has to launch the clock by clicking on the play icon, and activate the audio feedback, by tapping this button :
![]()
2- the slave should also activate the audio feedback, and then synch the sounds of both device by dragging your finger on the delay labelled value.
Once sounds are in synch you are good to go !
Have Fun !